Pages

Wednesday, 30 May 2012

Rice Bubble Dessert Sushi Fail-ish

Rebekah and Haeata came over to make candy sushi as seen on her blog Tiny Thrills, which Rebekah actually sourced from Wandering Chopsticks

So we had a go at this little project.  We made the rice crispies as per Rebekah's recipe:

Rice CrispiesRecipe

Ingredients:
1/2 cup butter
1/4 cup sugar
1/4 cup honey
3 1/2 cups rice bubbles / crispies

Directions:
  1. Boil butter sugar and honey together until caramel reacheds 'soft toffee stage'.  (can drop into water and roll into ball stage).
  2. Take off heat and stir into bowl full of rice bubbles.
  3. Press onto greased / lined tray and let cool.
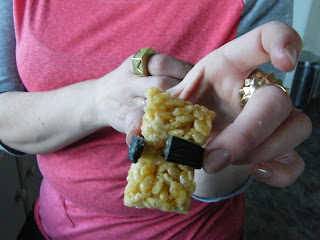
Rebekah is a pro at that part.  So all perfect so far.  Now for the sushi stage.  We had dinosaur lollies and licorice strap.  We made a paste with icing sugar and a little water to glue on the lollies cut the licorice to be nice and thin, glued and...... no stick.  As you can see it did not stick.  Very sad.

Dessert Sushi with lollies

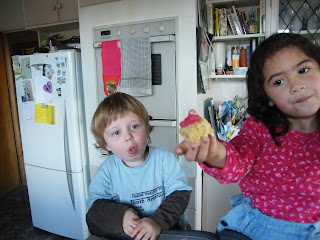
However,  they were still delicious.  As you can see our taste testers thought so.

Dessert Sushi

Afterwards, we thought that using jelly snakes to tie around the middle might work better.  Maybe cutting them at the end to reveal the sticky middle would make it work like sellotape?
A catering acquaintance of Rebekah's has reportedly since tried using snakes successfully - she just tied them! So simple and apparently very effective.

Tuesday, 29 May 2012

Giant Building Blocks

We came across some giant lego building blocks last year at Petrosains Discovery Centre in Kuala Lumpur (OK - so funded by oil & gas company Petronas - but totally awesome museum for little kids)*. 

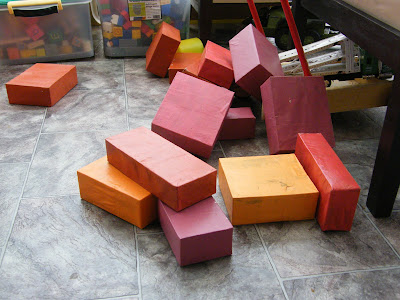
I had a look online when we got home to discover that Lego no longer make these blocks and the ones that are floating around are insanely expensive.  Luckily we were watching TV one day and saw a segment of OURS which showed a playcentre using recycled boxes as blocks.  I thought - hey I can paper mache and paint them too with Phineas and then we've got our own recycled blocks to play with PLUS if they get squashed we can just recycle them.  Awesome!

Each step is kid capable stuff so this is something you can do together.  It is time consuming, but it's an activity, not a chore so you can make more boxes as you use up stuff from the pantry.

Giant Blocks
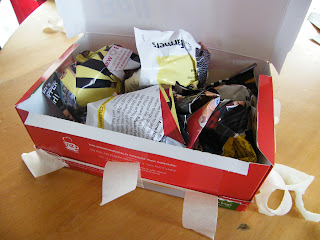
1.  Fill box with scrumpled paper from old magazines / newspapers.
2. Tape box closed with masking tape (not sellotape).  Otherwise don't worry about taping it at all as you can just seal with paper mache.  This is as far as the playcentre got for their blocks on the DVD which would work just fine, but I like my blocks to look less like abandoned marketing and more like rainbows!

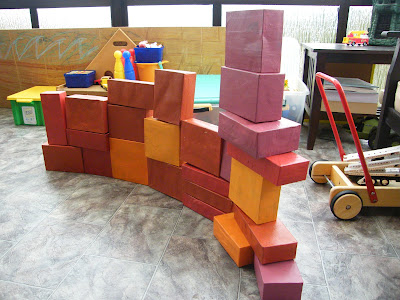
3.  Papier mache using strips of newspaper and wallpaper paste.   Once dry, paint with leftover acrylic test pot paint.

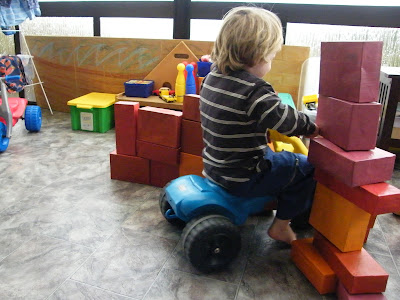
giant toy building blocks

giant toy building blocks

giant toy building blocks

Covered Gourmet Icecream Container

This time I had a funny shaped icecream container.  It is a remnant of the period of time where we would only buy food that had NO NUMBERS in it.  It turned out to be almost impossible for icecream unless you get the expensive stuff that comes in tiny containers. 


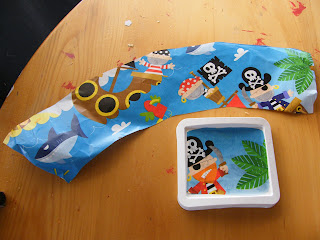
Anyway, it's got a tapered base and larger top.  To get the right fit.  Lay container on its side and trace edges, roll and trace, roll and trace, roll and trace until you have all 4 sides traced.  Allow a little extra on one end for overlap and cut out.

paper covered box
Lid is straight forward.  Sides end up curving around.  Once you have cut out, you can then easily wrap around sides and trim any excess you might have - no need to be a perfectionist as you are going to be letting this loose on children.
Some used pirate wrapping paper was utilised.  This is from the 3 year old's birthday presents.  Don't worry if paper is a bit creased - once glued on it smooths out a lot. 

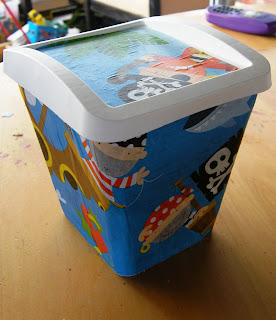
Once all trimmed, get your trusty wallpaper paste and glue container (littlies love to help with this bit).  Then smooth on paper and add a bit of extra paste at edge for overlap.
paper covered box
Gorgeous
This container is perfect for storing those felt pens and markers. Having the wider top works really well as the pens splay out and make it easier for little hands to get in and choose the colour they want. 

Thursday, 24 May 2012

Printing on Wallpaper

I've had 3 wallpaper sample books for about 10 years now.  They are huge and have hundreds of pages.  I really want to go get some new ones, but get into trouble when the garage starts looking like a hoarder's haven.  So need to use them up and soon! 

My latest idea was to make thank you cards with them.  I have discovered that if you have a laser printer, it will print on the vinyl perfectly.  I only had a black and white printer, which works fine for me.  Too much colour would compete with the patterns on the paper.  Best to keep it simple.

So cut your paper into A4 sheets.  Set up a template and print.

I found this to be great for thank you cards also as it saved time for me.  No gluing buttons, cutting out intricate flowers or any other crazy stuff I've done in the past.  I do like sending thank you cards, but sometimes I get halfway through and wish I hadn't started.  (Out of a previous lot of cards, only half a dozen were actually finished and posted out - sorry everyone else....)


Wednesday, 23 May 2012

Latest Pink Owl Bunting

Owl Bunting Upcycled & Vintage Fabrics
$45.00
Owl Bunting - Vintage and Upcycled Fabrics - Pink
$45.00
 I have just made and listed some pink owls on felt.  So cute.


Plastic Jam Pot Uses

My favourite jam is from Anathoth.  Not only is their jam delicious, but when I bought my 3 Berry Jam the other day, I noticed a new label on the lid.

I love that it is reminding people to re-use their plastic pots.  It highlights the fact that they are also microwavable, freezer safe and BPA free.
PLUS it list some ideas for using the pots for other things such as raising seedlings, children's crafts, a pen holder or even something to tidy screws and nails.
I have always reused my jam pots - the seal is fantastic and the plastic doesn't seem to wear out the way other food pots do.  So cool to see companies thinking of stuff like this.  I know people go on about greenwashing, but surely even just promoting green thinking is a good start for people who might not even consider it otherwise.

Saturday, 19 May 2012

Painting with Cars

This is an idea I got from Phin's daycare teacher.  She was trying to engage him in painting by combining it with his number one passion: cars. 
All you need for this one is some paint, brushes, paper and toy cars with different wheel textures. 
If you're using child friendly poster paint it will wash off the cars easily with water.
I used my trusty wallpaper sample book to get some grey textured paper for a 'road' look.  (If using vinyl wallpaper and paint gets too thick, poster paint will flake off a bit once dry).

Techniques:
  • Dollop of paint in a tray and roll car through then drive it on the paper.
  • Paint using brush directly onto tyres then drive it on the paper.
  • Paint directly onto paper then roll cars through spreading paint around.

Painting onto paper before rolling car through.


One finished work showing true artistic genius!
The artist is likely to get sidetracked and start painting cars and generally playing more than painting, but that is the goal.  This is great for getting a car mad, paint averse child into art.
Like a true off roader.  Only the mud puddle is a weird yellow colour.