Pages

Thursday 6 December 2012

Fabric Tree Stack Wandering

Spot the tree
I gave the best made tree (of the two I've completed so far) to my craft buddy Suzy at our end of year secret Santa (ok not so secret) gift exchange.  Mr Mover moved in and lived on the shelf above for a while.  See if you can spot him.

Today I got this message:
Someone is on an adventure! This is where I found the tree 
this morning. Suz


He reminds me of those travelling gnomes.  But he seems to be hanging around for now.

How to make can be found in my previous post Fabric Tree Stack Christmas Decorations.

Monday 3 December 2012

Fabric Tree Stack Christmas Decorations

I was going to make some trees to fit in baby jars, but on closer inspection decided that baby jars really are tiny.  Sewing tiny things is not a sewing machine kind of thing.  (which is why I think paying grown-up prices for children's clothing is completely fair.  Imagine how tricky some of that sewing is on a miniature scale).  Umm...

Ok.
This is the tutorial I followed: The Small Object Archive.
I decided not to use a glue gun as I was having a misguided 'no toxic chemicals' moment.  Glue gun would work great though.  I, however, used a needle and thimble to sew through the tips of all the tree stack a few times, then knotted to fix.

However I wanted to add a bit of bling, and also have them hanging on the tree.  So this is what I did:

  1. I  took some bead strands and sewed at a few points around the tree.  
  2. I then sewed through the middle of each stack with some gold thread and did not pull thread tight, but left a big loop which I then knotted together at the tip of the tree both on the inside and outside.
Perfect way to use offcuts of old fabric.

Voila! Very cute christmas tree decorations.

Sunday 25 November 2012

Baby Jar Christmas Crafts

There are so many good ideas for baby jars.  I think they make fantastic Christmas crafts and very cute gifts. 

Here are my 5 favourites:


1. Glitter 'snowglobes' using old toys as decorations.

2. I-spy jars using old toys and rice.

 3. Sewing jar with pincushion lids. 

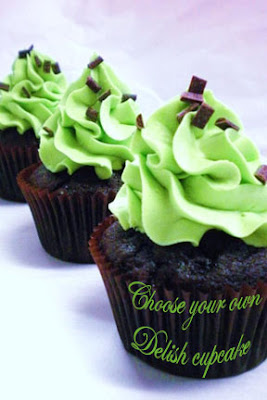
4. Individual gift cupcakes. (easy option gift dry cupcake mix).

5. Christmas tree dioramas.

I am going to try out all of these I think.  Now I only need some baby jars....

An honorable mention goes to these Christmas trees that people seem to enjoy making.  Not sure that I am super keen on the finished look, but A+ for effort.

Thursday 15 November 2012

DIY Painting Stained Glass Door - Shortcut Fails

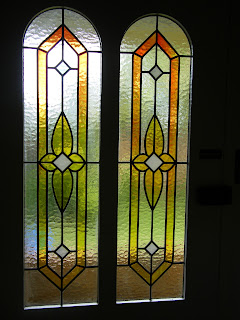
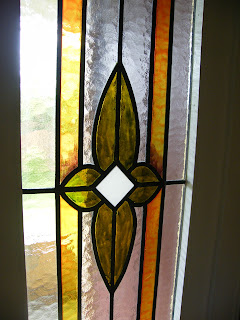
I have an old-ish house with a stained glass front door.  It has been made with some inferior glass I guess.  The little opaque squares seem to be proper stained glass, but the other pieces must have been painted then fired (rather than the colour going all the way through).  They have faded badly.
painting on stained glass
So faded!

I have been googling all over the place trying to find a glass paint that I could use.  I started out looking at Pebeo's Vitrea 160 range which is down at the local Spotlight store.  However they didn't stock the colours I wanted (only stocking the bright-primary style hues).  I wanted the Tea Green and Crimson. 

I was also dubious about the fact that I wouldn't be able to bake the glass once painted.  I'm going for a quick fix here.  There's no way I'm going to take out each panel, paint and bake and then put pack in.

So I went for the Lefranc & Bourgeois Vitrail range which have slightly different colours but no mention of baking. I chose Olive Green and Violet.

The main thing to remember is that I am painting over colour that is already there.  It has faded in places, but any colour I chose was always going to have a yellow base.  So although I chose a purple, it will mix with the yellow to create a red-brown.  Any green I choose will have extra yellow tones.

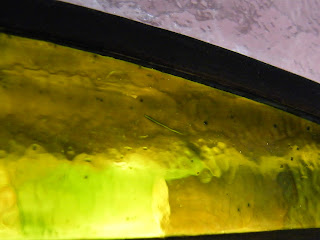
However nothing is ever as straight-forward as you'd like.  I washed the glass with spirits as per instructions (normally I never do things properly) but after the initial diligence, I sadly didn't pay attention to something I saw mentioned somewhere about making sure to use a soft sable brush.  I used a chisel bristle brush which meant all the brush strokes showed very clearly.  Not the effect I was after.  So I had to wipe it all off again with turps and start again.
Bristle Brush Bad for Painting Stained Glass
Don't use a hard bristle brush when glass painting.

Now my problem is that I used a very CHEAP sort brush so all the bristles keep coming out.  I have to keep flicking them out, which causes funny patches of either extra colour or too little colour or even worse - I miss them and then the brush hairs stay on the glass.  

When  will I ever learn that taking shortcuts doesn't pay??????

DIY Stained Glass Door
Very nice... but what's that stuck in the glass?

Click here to view finished result.

Monday 12 November 2012

Preschooler Teepee

This is super clever.  Olivia was going to give it away?! But as it took two intense weekends to make (plus all the materials) she has decided to keep it at her place for small visitors to play with.

This super cute teepee was made by the lovely Olivia.
It was based on a Your Home and Garden pattern, with a few Mocka inspired tweaks in the pattern to make it even better (and work with the fabric widths - 120cm instead of 150cm) .  The dowels have beads and elastic threaded through at the top so the whole thing folds away easily.

Sunday 19 August 2012

One Way to Use Old Books

Found this site today: Upon a Fold.
Of course the page I happened upon was from years ago - the Holland Paper Biennial in fact.

Holland Paper Biennial
Anouk Kruithof
What an awesome way to use old books.  Would need to have a lot of patience to collect them.  Maybe you could just stain the pages at one end of a book.  Round up all the leftover from a book or school fair.  They just get sent to the tip otherwise.

Sunday 1 July 2012

Cupcake Voucher

cupcake IOU reward voucher
There's a great cupcake place around the corner from us.  Definitely a good pick for a reward voucher.

Wednesday 20 June 2012

Trampoline IOU Reward Voucher

Trampoline voucher for rewards.

Click here for full size PDF image
.

Wedding Bunting Mention

Super exciting - just got first mention and link to my owl bunting in another blog: Paper and Lace.


I feel inspired to actually make more bunting now.  Maybe my next bunting could be a bit more wedding-y than owls though...
I was a bit surprised to be included though to be honest.  I'm not sure whether many or even any brides would go for owls hooting around for wedding decor, but if you've even seen some of those bridal reality shows from the UK or US there's definitely people with individual taste out there.

Tuesday 19 June 2012

Kelly Tarlton's IOU Reward Voucher

This is my first attempt at a reward voucher for the children.  Thought Kelly Tarlton's would be a good one.  Might have to think a bit smaller (i.e. cheaper) for others... maybe jumping on the trampoline or something.

It is 6x4" so easy to print off as a photo.

Click here for PDF to download

Sunday 17 June 2012

Tissue Box Feet

Really like these tissue box feet.

Really an extension of our paper mache giant blocks.
Also had some boxes on Ollie's arms and feet the other day which makes a really easy robot costume.

Tuesday 5 June 2012

Pixelation and an Ode to All Things Square

I am in love with squares.  I love square paintings, frames, rubics cubes, square bedside tables, Charles Rennie Mackintosh (that's because I also love Art Nouveau and he made it more square), patchwork quilts (not ones with diamonds, or triangles - only squares), and pixels. 

The greatest things about photoshop is that you can pixelate an image into squares of any size you choose.  I have mentioned ixxi before and still have my version of Girl With a Pearl Earring to finish off for the hallway (but like everything else in my house still needs wall stripped of old wallpaper, replastered, sanded and painted.....hours of boring work).


There are also all sorts of programs I'm sure, for breaking down images into squares because that must be how they do it for cross stitch....  like KG Chart which apparently is free.  


The main thing to remember when pixelating something is the scale.  Say you are making a cot blanket - the dimensions are approx 110 x 130cm.  So if you are making each square 10cm, you can only have 13 squares by 11 squares. It would need to be a very simple image.  If you decide to go with 5cm squares, you have more to play with, but also twice the work.  It would be better to go with 7.5 cm which would mean 105cm x 127.5cm quilt, with 14 squares by 17 squares (but you can adjust to 15 x 18 squares) 


In Photoshop: go to Filter - Pixelate - Mosaic.  You can adjust the pixel size.  130 is about the limit for an image - so you can just tell what it is meant to be.  It is getting quite abstract though.

pixelated bunny rabbit
 
And then use the crop tool to crop the image to the number of squares the project will be.
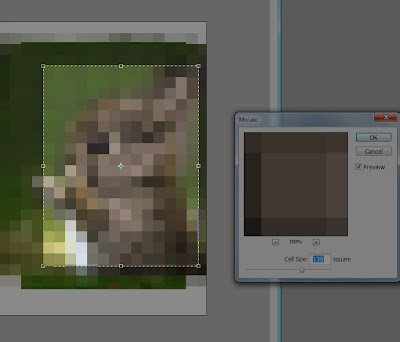
pixelated bunny rabbit
This is about 14 x 18 squares I think.

Finally you need to find lots of scraps of fabric that are approximately the right colours.  If you went for something like this rabbit, it will eventually be difficult to see what the image is meant to be, but you'll have a lovely quilt in a neutral palette of browns and greens.  Way stylier than pink or blue.
The simpler the image, and fewer colours, the easier it is.  Easier is sometimes good, but not usually as interesting.

Monday 4 June 2012

To Upcycle.....or not

There is a bit of a fashion at the moment for upcycling old wool blankets into nice looking but slightly scratchy cushions.  People are even appliqueing some interesting imagery on them....such as jandals.  Maybe you sit back on them to relax, itch, fidget, watch the rain outside and reminisce about summer days?

Or you could always forgo the trend and donate useful much needed blankets to organisations like Supportline Women's Refuge Trust who are very much in need of any blankets, linens, bedding, curtains or any household items.  A lot of their extra stuff went out to families after the Christchurch earthquakes and there are many families in need.

So maybe a blanket is better off staying that way - even if it has a stain or tear or hole.  Much more useful keeping a small child warm than as a fleetingly fashionable throw(away) cushion?

Friday 1 June 2012

Egg Carton Traffic Lights

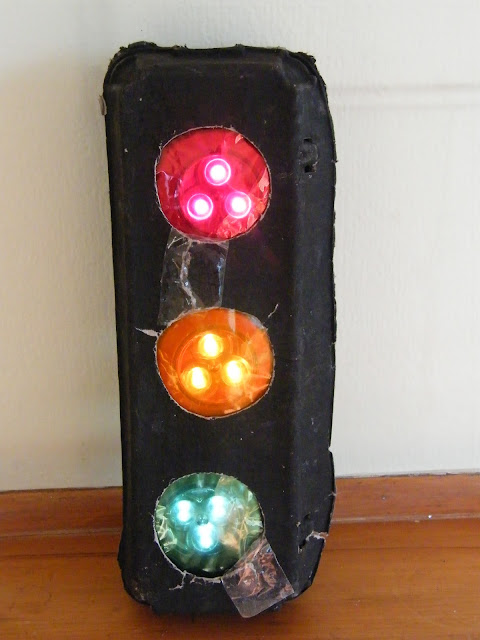
egg carton cardboard traffic lights
Well loved traffic lights
These brilliant traffic lights are the result of Briar's genius.  She leads a preschool kapa haka group: Kiddy Kapa Haka.  There is a song about road safety in Te Reo Maori and she felt a traffic light would help the children's understanding.  Being Briar, she didn't just draw a poster of some traffic lights.  She went and made some working lights.  The children LOVE them.   Phineas was lucky enough to get some for his birthday.  Unfortunately the lights are so popular that they have been thrashed a bit.  No worries, they still do the job.


You will need:
  • Egg carton
  • Black paint
  • Cardboard cut into size of middle of carton
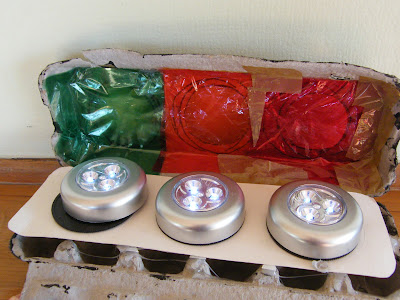
  • 3 x touch lights - you can get them from the $2 shop.
  • Glue gun and glue.
  • Cellophane in red, yellow/orange and green.
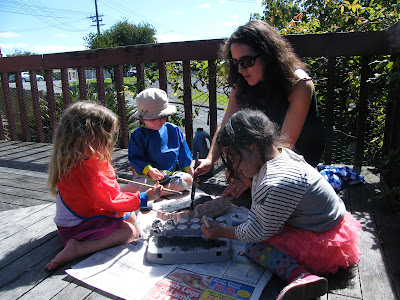
painting egg carton traffic light
The littlies helping Briar paint the cartons.
  1.  Paint carton.  This can be done with expert help. Let dry.
  2. Cut 3 circles for lights. 
  3. Glue long piece of cardboard in middle of carton.
  4. Close lid.  Trace around the circles you have cut onto the cardboard.
  5. Fold cellophane into square making at least 3 layers.
  6. Glue squares inside carton where the holes have been cut. (In traffic light order)
  7. Glue lights onto cardboard where you have traced the circles.
egg carton cardboard traffic lights
The masking tape is another emergency repair job.  I think this is a toy for responsible children to look after and irresponsible children to play with, have a great time and gradually destroy.  Lots of fun before it gets to the end though.

Wednesday 30 May 2012

Rice Bubble Dessert Sushi Fail-ish

Rebekah and Haeata came over to make candy sushi as seen on her blog Tiny Thrills, which Rebekah actually sourced from Wandering Chopsticks

So we had a go at this little project.  We made the rice crispies as per Rebekah's recipe:

Rice CrispiesRecipe

Ingredients:
1/2 cup butter
1/4 cup sugar
1/4 cup honey
3 1/2 cups rice bubbles / crispies

Directions:
  1. Boil butter sugar and honey together until caramel reacheds 'soft toffee stage'.  (can drop into water and roll into ball stage).
  2. Take off heat and stir into bowl full of rice bubbles.
  3. Press onto greased / lined tray and let cool.
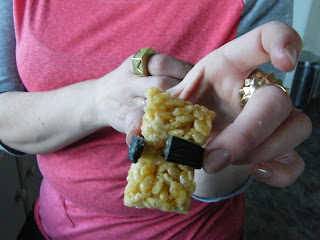
Rebekah is a pro at that part.  So all perfect so far.  Now for the sushi stage.  We had dinosaur lollies and licorice strap.  We made a paste with icing sugar and a little water to glue on the lollies cut the licorice to be nice and thin, glued and...... no stick.  As you can see it did not stick.  Very sad.

Dessert Sushi with lollies

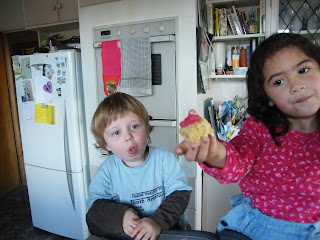
However,  they were still delicious.  As you can see our taste testers thought so.

Dessert Sushi

Afterwards, we thought that using jelly snakes to tie around the middle might work better.  Maybe cutting them at the end to reveal the sticky middle would make it work like sellotape?
A catering acquaintance of Rebekah's has reportedly since tried using snakes successfully - she just tied them! So simple and apparently very effective.

Tuesday 29 May 2012

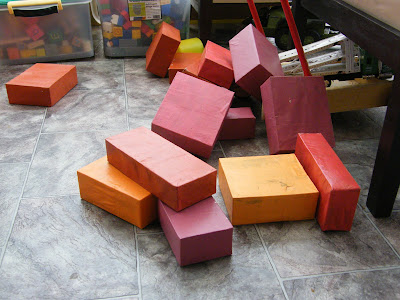
Giant Building Blocks

We came across some giant lego building blocks last year at Petrosains Discovery Centre in Kuala Lumpur (OK - so funded by oil & gas company Petronas - but totally awesome museum for little kids)*. 

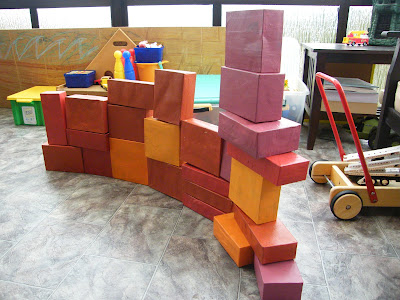
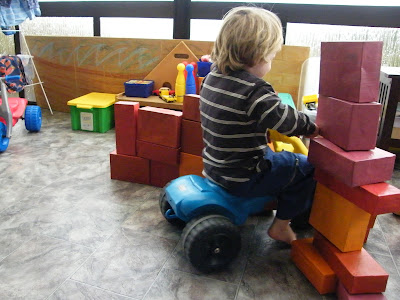
I had a look online when we got home to discover that Lego no longer make these blocks and the ones that are floating around are insanely expensive.  Luckily we were watching TV one day and saw a segment of OURS which showed a playcentre using recycled boxes as blocks.  I thought - hey I can paper mache and paint them too with Phineas and then we've got our own recycled blocks to play with PLUS if they get squashed we can just recycle them.  Awesome!

Each step is kid capable stuff so this is something you can do together.  It is time consuming, but it's an activity, not a chore so you can make more boxes as you use up stuff from the pantry.

Giant Blocks
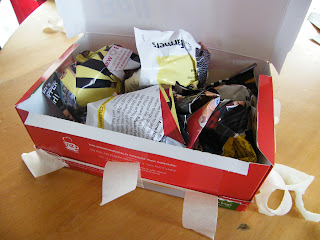
1.  Fill box with scrumpled paper from old magazines / newspapers.
2. Tape box closed with masking tape (not sellotape).  Otherwise don't worry about taping it at all as you can just seal with paper mache.  This is as far as the playcentre got for their blocks on the DVD which would work just fine, but I like my blocks to look less like abandoned marketing and more like rainbows!

3.  Papier mache using strips of newspaper and wallpaper paste.   Once dry, paint with leftover acrylic test pot paint.

giant toy building blocks

giant toy building blocks

giant toy building blocks

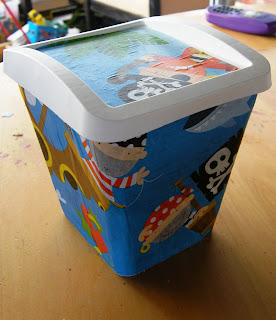
Covered Gourmet Icecream Container

This time I had a funny shaped icecream container.  It is a remnant of the period of time where we would only buy food that had NO NUMBERS in it.  It turned out to be almost impossible for icecream unless you get the expensive stuff that comes in tiny containers. 


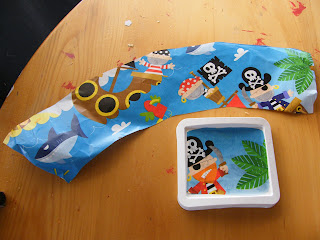
Anyway, it's got a tapered base and larger top.  To get the right fit.  Lay container on its side and trace edges, roll and trace, roll and trace, roll and trace until you have all 4 sides traced.  Allow a little extra on one end for overlap and cut out.

paper covered box
Lid is straight forward.  Sides end up curving around.  Once you have cut out, you can then easily wrap around sides and trim any excess you might have - no need to be a perfectionist as you are going to be letting this loose on children.
Some used pirate wrapping paper was utilised.  This is from the 3 year old's birthday presents.  Don't worry if paper is a bit creased - once glued on it smooths out a lot. 

Once all trimmed, get your trusty wallpaper paste and glue container (littlies love to help with this bit).  Then smooth on paper and add a bit of extra paste at edge for overlap.
paper covered box
Gorgeous
This container is perfect for storing those felt pens and markers. Having the wider top works really well as the pens splay out and make it easier for little hands to get in and choose the colour they want. 

Thursday 24 May 2012

Printing on Wallpaper

I've had 3 wallpaper sample books for about 10 years now.  They are huge and have hundreds of pages.  I really want to go get some new ones, but get into trouble when the garage starts looking like a hoarder's haven.  So need to use them up and soon! 

My latest idea was to make thank you cards with them.  I have discovered that if you have a laser printer, it will print on the vinyl perfectly.  I only had a black and white printer, which works fine for me.  Too much colour would compete with the patterns on the paper.  Best to keep it simple.

So cut your paper into A4 sheets.  Set up a template and print.

I found this to be great for thank you cards also as it saved time for me.  No gluing buttons, cutting out intricate flowers or any other crazy stuff I've done in the past.  I do like sending thank you cards, but sometimes I get halfway through and wish I hadn't started.  (Out of a previous lot of cards, only half a dozen were actually finished and posted out - sorry everyone else....)


Wednesday 23 May 2012

Latest Pink Owl Bunting

Owl Bunting Upcycled & Vintage Fabrics
$45.00
Owl Bunting - Vintage and Upcycled Fabrics - Pink
$45.00
 I have just made and listed some pink owls on felt.  So cute.


Plastic Jam Pot Uses

My favourite jam is from Anathoth.  Not only is their jam delicious, but when I bought my 3 Berry Jam the other day, I noticed a new label on the lid.

I love that it is reminding people to re-use their plastic pots.  It highlights the fact that they are also microwavable, freezer safe and BPA free.
PLUS it list some ideas for using the pots for other things such as raising seedlings, children's crafts, a pen holder or even something to tidy screws and nails.
I have always reused my jam pots - the seal is fantastic and the plastic doesn't seem to wear out the way other food pots do.  So cool to see companies thinking of stuff like this.  I know people go on about greenwashing, but surely even just promoting green thinking is a good start for people who might not even consider it otherwise.

Saturday 19 May 2012

Painting with Cars

This is an idea I got from Phin's daycare teacher.  She was trying to engage him in painting by combining it with his number one passion: cars. 
All you need for this one is some paint, brushes, paper and toy cars with different wheel textures. 
If you're using child friendly poster paint it will wash off the cars easily with water.
I used my trusty wallpaper sample book to get some grey textured paper for a 'road' look.  (If using vinyl wallpaper and paint gets too thick, poster paint will flake off a bit once dry).

Techniques:
  • Dollop of paint in a tray and roll car through then drive it on the paper.
  • Paint using brush directly onto tyres then drive it on the paper.
  • Paint directly onto paper then roll cars through spreading paint around.

Painting onto paper before rolling car through.


One finished work showing true artistic genius!
The artist is likely to get sidetracked and start painting cars and generally playing more than painting, but that is the goal.  This is great for getting a car mad, paint averse child into art.
Like a true off roader.  Only the mud puddle is a weird yellow colour.

Tuesday 15 May 2012

Wedding Pew Bows

My gorgeous sister just got married so it has been a crazy few weeks.  She loves bright colours, so we were commissioned to make bows for the pews.  My mum googled and found one that she thought we could have a go at.  It involves tulle, ribbon, beads and silk flowers - although we found some lovely foam roses at Spotlight which we ended up using.  The church is an old wooden one - very dark interior and richly coloured stained glass windows, so the red Michelle chose worked really well I think.


We were just going to use wire to tie it all together, which was fine for the tulle part, but my aunt came around to help tie bows (not my strongest point - it is very difficult to tie a symmetrical bow I discovered) and she had us all hand stitching the ribbon, beads and roses to the top.  Sounds difficult, but actually very simple and quick.  We had it done in a few hours. 


Top tip: Get a few people over to help for stuff like this.  It's more sociable and you can get a production line going with each person doing the part they are best at.  Maybe break out the bubbles after you've finished though.